Trigger an Avada modal on page load
Default Avada modal windows
This discussion assumes you have installed WordPress and Avada theme and are reasonably comfortable using both applications. You should also have a basic understanding of HTML, CSS and JavaScript/jQuery.
Modal windows are handy for adding dialogs, user notifications or other content to your site, providing instant interaction with the user. They can be used to display alerts or pretty much any HTML content, videos, images etc.
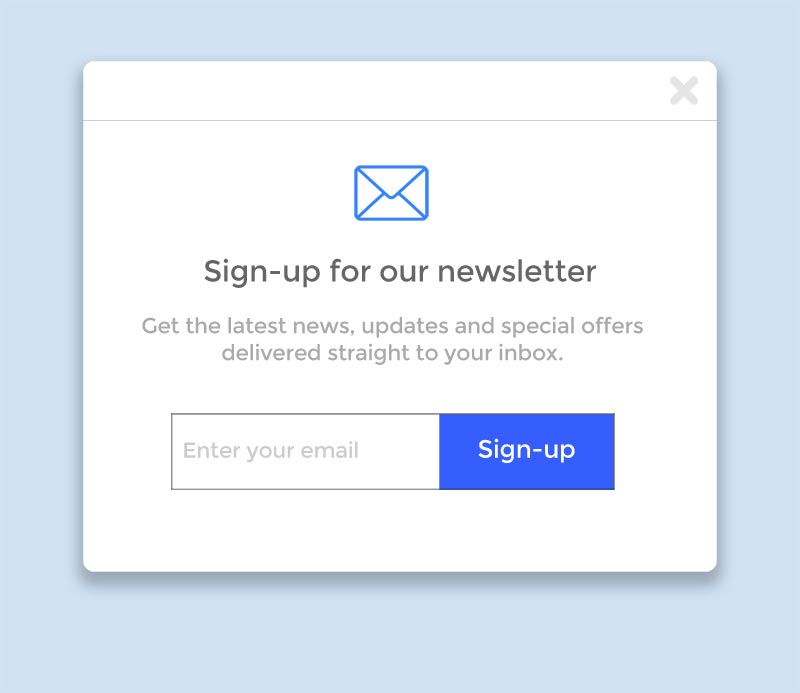
Avada, a popular theme for WordPress, includes a modal (popup) element.
Themefusion, the creators of Avada, provide detailed instructions for setting up a modal window in their online documentation.
The documentation provides instructions on how to trigger your modal window with a click of a button, a text link or an image.
However, if you wish to trigger your modal window automatically, say, on page load – or maybe after a number of seconds have elapsed once the page loads – the Avada documentation doesn’t cover this.
So, in this tutorial, we’ll cover the following:
- Part 1 – Set up and automatically trigger an Avada modal
- Part 2 – Automatically trigger an Avada modal after a short delay
- Part 3 – Use a cookie to show an Avada modal once only
Part 1 – Trigger an Avada modal on page load
Let’s see how we might set up an Avada modal window that is automatically triggered as soon as the page loads.
Ordinarily, we’d need a copy of the Bootstrap JavaScript, the Bootstrap CSS and the jQuery library. However, Avada already provides (loads) all these.
So, all we need to do is:
- set up our Avada modal HTML (create the modal).
- write a short jQuery script to trigger the modal window.
Create an Avada Modal Window
1. In the Avada Dashboard, create a new page. Add a Container to the page and choose a column layout.
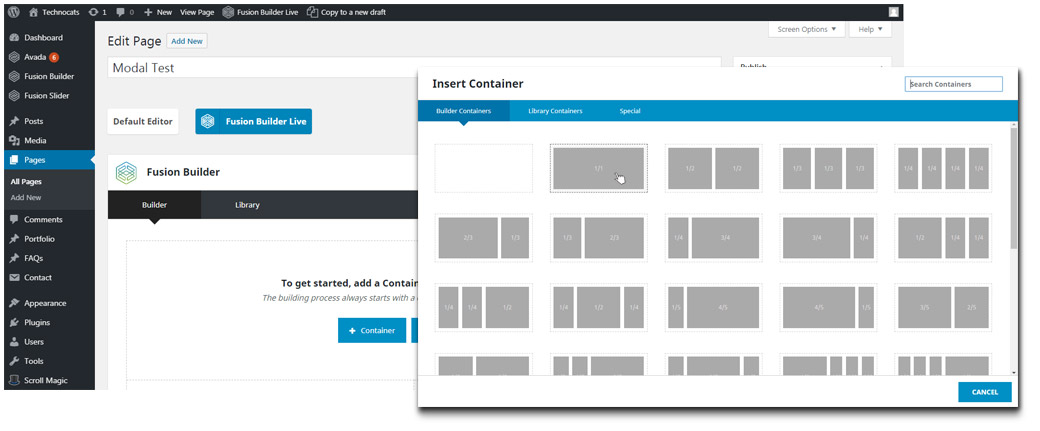
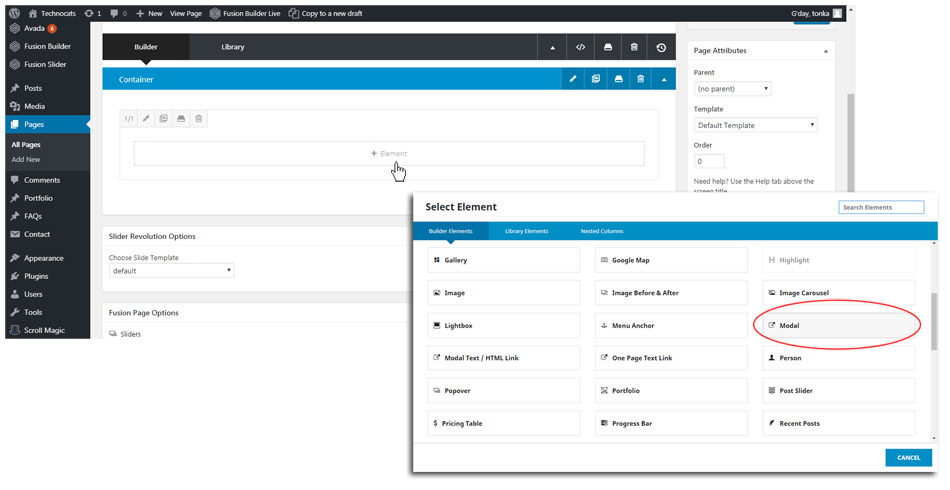
2. Click the ‘+ Element’ button on the column to open the Elements window. Locate the Modal Element and click it to open the Options window. You can insert the Modal element anywhere on your page.
3. In the Name of Modal field, enter a unique name (a unique identifier) for your modal. This is the name we will use to refer to our modal window in the JavaScript used to trigger the modal and set a cookie. Best to keep it short and sweet.
For example, you could call your modal my-popup or modal-popup. I’m going to use the-modal as my unique identifier.
NOTE THAT, WHATEVER UNIQUE IDENTIFIER YOU USE, THIS NAME MUST BE USED CONSISTENTLY WHENEVER YOU REFER TO THE MODAL IN THE SCRIPTS WE’LL WRITE A LITTLE LATER.
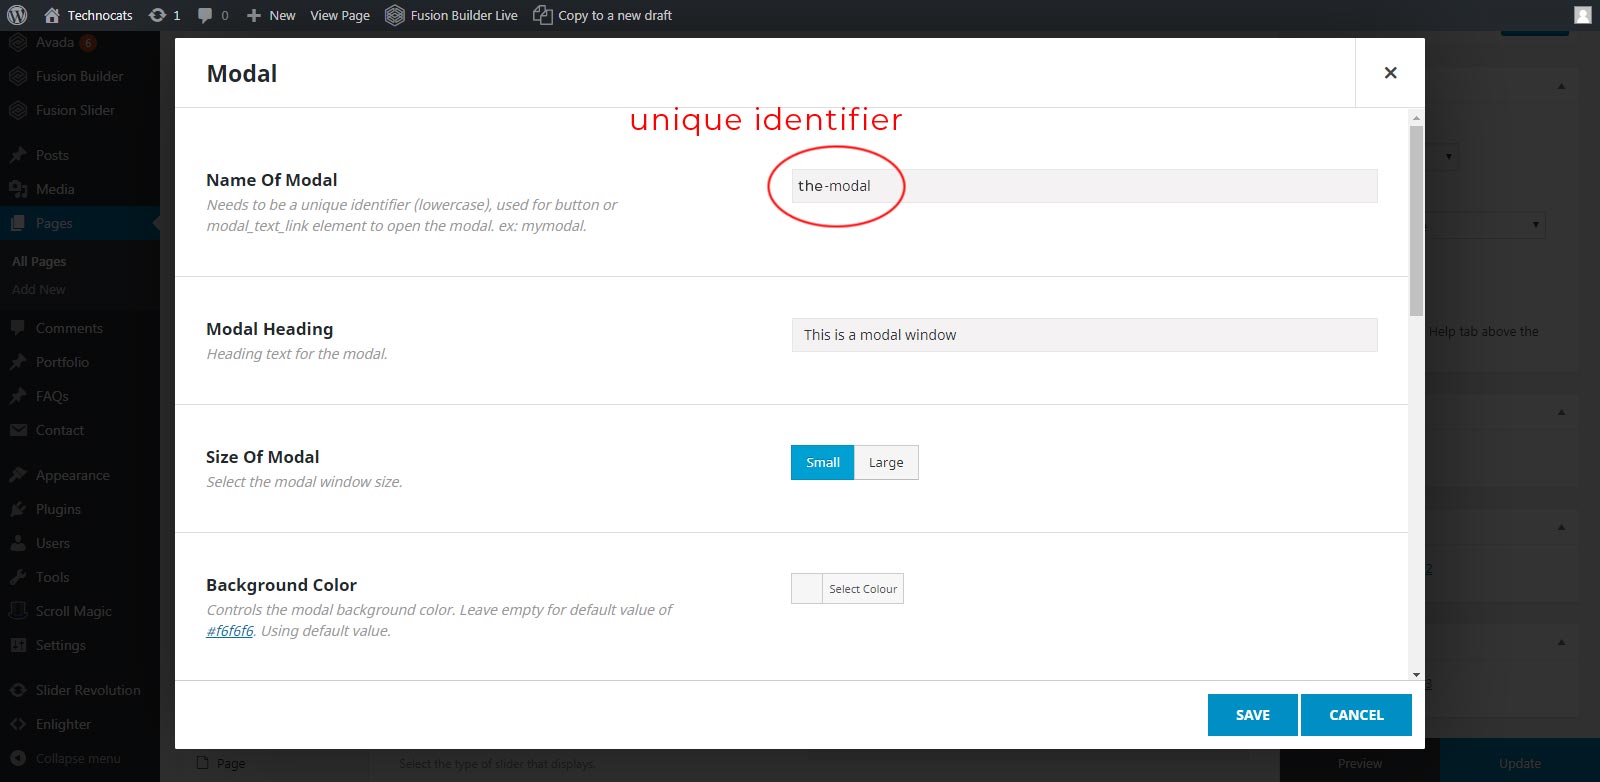
4. Now configure the other features of the modal.
You will need to set the Modal Heading, the Size of Modal, Background Color, Border, Show Footer and the Contents of Modal.
5. Save and update your WordPress page and view in a browser.
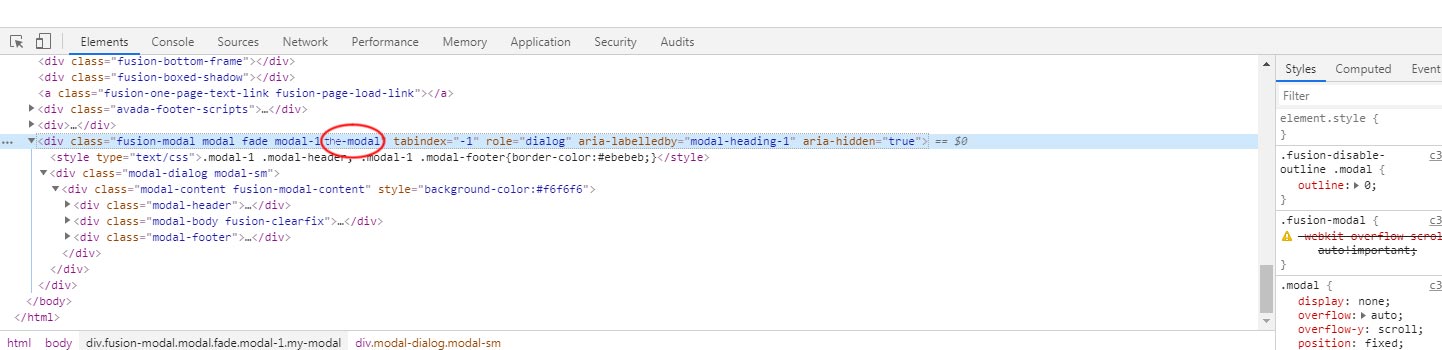
You won’t see a modal window just yet. However, if you right-click and choose ‘View page source’ (or use your browser’s developer tools), you can inspect the background HTML. If you look carefully, you should be able to find the HTML which creates the modal window.
If you can find the parent tag, amongst the CSS classes that have been applied to it you should see the unique identifier, the unique name you assigned to the modal, applied as a CSS class to the modal’s main div tag
In my case, because I used the-modal as the unique identifier, I see the term the-modal applied as a class the the div tag.
Now that the modal HTML is in place, we’d normally now set up a button (or link) to trigger the modal window. However, instead, we’re going to use a jQuery script to automatically trigger the modal.
Create a script to trigger the modal window
Since we have access to jQuery (WordPress loads jQuery by default), we’ll write a jQuery script to automatically trigger the modal on page load.
1. In your favourite text editor, create the following script:
(function($){

   $(document).ready(function() {
        $('.the-modal').modal('show');
   });

})(jQuery);
Note:
Lines 1 & 7 – Firstly, to avoid any possible conflicts, we wrap our code in an anonymous function:
(function($){


})(jQuery);
Read more about avoiding conflicts with jQuery:
learn.jquery.com/using-jquery-core/avoid-conflicts-other-libraries/
Lines 3 & 5 – Before you can use jQuery on a page, you need to ensure that the page is in a state where it can be manipulated.
We use $(document) to create a jQuery object from our page’s document, and then call the .ready() function on that object, passing it the function that we want to execute.
 $(document).ready(function() {

   });
Line 4 – Finally, we call the modal with a single line of JavaScript.
$('.the-modal').modal('show');
Here I’m using the class .the-modal (the unique identifier I gave the modal when I created it earlier) to select the modal.
Note that, if you used a different name to identify your modal, say modal-popup for example, then you would use this name in the script. For example:
$('.modal-popup').modal('show');
We then call the modal function on the modal’s selector and pass the show option to the function.
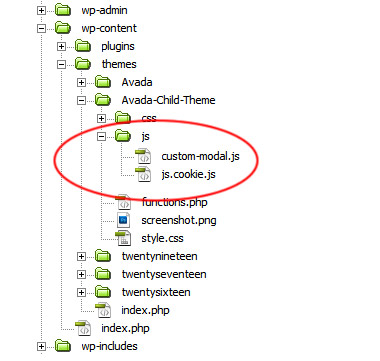
2. Save your completed file as custom-modal.js
Upload the script
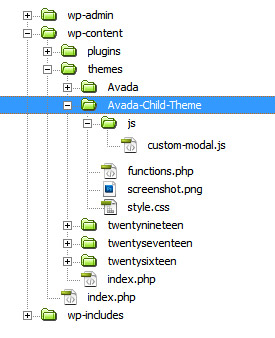
Now we need to upload our script to the WordPress install on the server. I’m going to assume you are using the Avada Child Theme. You’ll find the child theme amongst the files you downloaded when you purchased Avada. We’ll upload our files to the child theme folder.
1. First, create a new folder on your hosting server within the child theme folder. Let’s name it js
You can do this using your web hosting control panel (e.g. cPanel, Plesk) or via FTP – your call.
2. Next, using your favourite FTP app, upload your custom-modal.js script to the newly created js sub-folder in the Avada Child Theme folder.
Load scripts into WordPress
We now need to make our script available to WordPress. Loading it into WordPress in an orderly fashion will avoid potential conflicts with plugins and other scripts that WordPress may be using and therefore enhance site speed and performance.
The wp_enqueue_script() function is the recommended method of linking JavaScript to a WordPress generated page.
wp_enqueue_script() has the following syntax:
- $handle (Required) Name of the script – should be unique.
- $src Full URL of the script, or path of the script relative to the WordPress root directory.
- $deps (Optional) Any scripts that your script may depend on.
- $ver (Optional) Specifies the script version number.
- $in_footer (True/False) (Optional) Specifies whether your scripts are placed in the footer of your HTML document or in thetag. If set to ‘true’, the script will be loaded before the closing body tag. If set to ‘false’, it will be loaded into the head tag. By default, the value is set to ‘false’.
Read more about wp_enqueue_scripts():
developer.wordpress.org/reference/functions/wp_enqueue_script/
developer.wordpress.org/themes/basics/including-css-javascript/
The full enqueue script is placed in the functions.php file. Hopefully you are using the Avada Child Theme. If so, you should use the child theme’s functions.php file.
Read more about Avada Child Theme:
theme-fusion.com/documentation/avada/install-update/avada-child-theme/
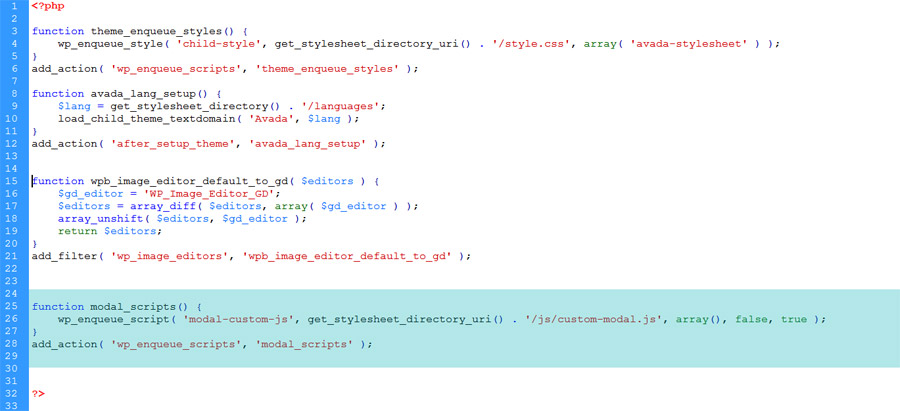
1. Access your child theme’s functions.php file and, in your favourite text editor, add the following script:
   function modal_scripts() {
      wp_enqueue_script( 'modal-custom-js', get_stylesheet_directory_uri() . '/js/custom-modal.js', array(), false, true );
   }
   add_action( 'wp_enqueue_scripts', 'modal_scripts' );
There may be other scripts already present in the functions.php file. Ensure your new script is kept separate to any other code.
2. Upload the functions.php file back to the Avada Child Theme folder on your server.
Test the Modal
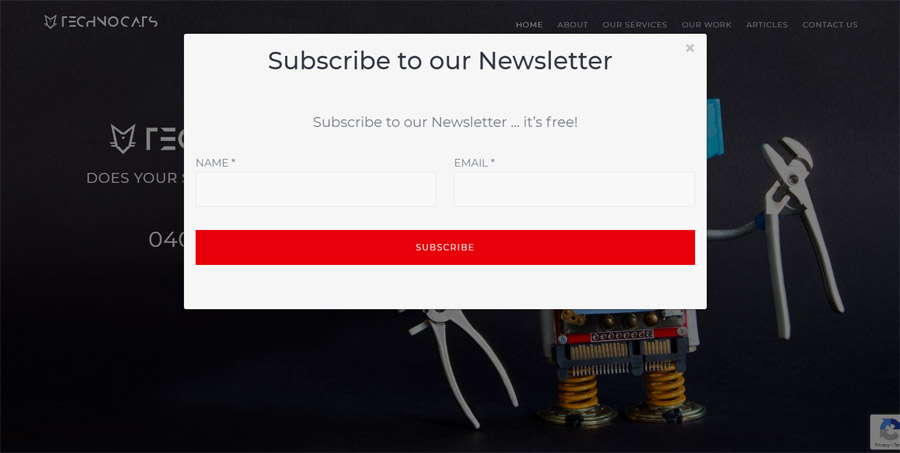
Now that we’ve created our modal HTML, set up our jQuery script (custom-modal.js) to trigger the modal and enqueued our scripts, we should be able to test our modal window.
1. Open your WordPress page in a browser and, if necessary, refresh the page. You should see a Bootstrap Modal appear as the page loads.
Part 2 – Delay the display of the modal
Rather than having the modal window appear immediately as the page loads, let’s delay its appearance.
To do this we’ll use the setTimeout() function. This sets a timer which executes a function or specified piece of code once the timer expires.
The setTimeout() function has the following syntax:
   setTimeout(function() {
      // Execute this code after 2 seconds
}, 2000);
Note that, in Line 3 above, the time is declared in milliseconds (1000ms = 1 second).
1. Open your custom-modal.js file and amend it as shown below:
(function($){

   $(document).ready(function() {
        setTimeout(function() {
            $('.the-modal').modal('show');
        }, 10000);
   });

})(jQuery);
Note: In the code above, line 6, we have set the setTimeout function to execute the code after 10 seconds (10000ms).
2. Save your work and upload the amended custom-modal.js file to the js subfolder in your Avada Child Theme folder, overwriting the copy already there.
3. Open your WordPress page in a browser (refresh if necessary). The modal window should display approximately 10 seconds after the page loads.
Part 3 – Add a cookie
As it is, our modal now shows every time we reload/refresh the page, or leave and come back to the webpage. This is going to become very annoying, very quickly, for our users. Let’s edit our code so that the modal window only appears once during a user’s visit to our website.
To accomplish this, we’ll use a cookie.
Cookies are used to store data in a client’s computer in small text files and are commonly used by a website to keep track of client visits and activity.
Read more about cookies:
au.norton.com/internetsecurity-privacy-what-are-cookies.html
JavaScript Cookie (js-cookie)
There are a number of apps which will allow you to work easily with cookies but I am going to use js-cookie, a simple, lightweight JavaScript API/library for handling cookies.
js-cookie supports the writing, reading and deleting of cookies in browsers. It works in all browsers and has been extensively tested.
You can download js-cookie here – or grab a copy via GitHub
1. Upload a copy of js.cookie.js to the js sub-folder inside your Avada Child Theme folder on your server, where you previously saved your custom-modal.js file.
Update the enqueue code in functions.php
1. Update the enqueue code in your functions.php file as shown below:
function modal_scripts() {
    wp_enqueue_script( 'js-cookie-js', get_stylesheet_directory_uri() . '/js/js.cookie.js', array(), false, true );
    wp_enqueue_script( 'modal-custom-js', get_stylesheet_directory_uri() . '/js/custom-modal.js', array(), false, true );
}
add_action( 'wp_enqueue_scripts', 'modal_scripts' );
Now js.cookie.js will be loaded into WordPress along with the custom-modal.js file.
2. Upload your functions.php file to your Avada Child Theme folder on the server.
Update custom-modal.js
js-cookie has the following basic syntax:
SET A COOKIE
Cookies.set(‘name’, ‘value’)
SET A COOKIE WITH AN EXPIRY VALUE
Cookies.set(‘name’, ‘value’, { expires: 7 })
Note: The expires value will be interpreted as days from time of creation.
READ A COOKIE
Cookies.get(‘name’)
You can read more about the syntax and usage of js-cookie here:
To use js-cookie, we’re going to employ some conditional logic, using a JavaScript conditional statement (an if/else statement).
Our logic, expressed in plain English, goes something like this:
Check for our cookie.
If the cookie exists, our visitor must have been to our site before and has seen the modal window, so hide it.
Otherwise, if there is no cookie, our visitor has not been to our site before so:
1. show them the modal window.
2. set a cookie so, next time they visit, they won’t see the modal again.
Conditional statements have the following syntax:
if (condition){
lines of code to be executed if the condition is true
}else{
lines of code to be executed if the condition is false
}
1. Open your copy of custom-modal.js in your favourite text editor and amend the code as shown below:
(function($){
    $(document).ready(function() {
        var thecookie = Cookies.get('modalcookie');
        if(!thecookie){
            setTimeout(function() {
                $('.the-modal').modal('show');
            }, 10000);
	           Cookies.set('modalcookie', 'true', { expires: 7 })
        }else{
            $('.the-modal').modal('hide');
        }
    });
})(jQuery);
Note:
Line 3
Assign the value modalcookie to the variable thecookie.
Line 4
if(!thecookie){
If the cookie does not exist ( ! = the Logical NOT operator ):
– show the modal after 10 seconds (lines 5 – 7).
– set a cookie (line 8).
Line 9
}else{
Otherwise (if the cookie already exits):
hide, do not show the modal (line 10).
2. Save and upload the custom-modal.js file to the server ( js sub-folder in the Avada Child Theme folder ).
OK, we’re done!
Clear your browser’s cookies and then visit your webpage. You should see the modal window. Leave the webpage and then return. Now, on your second visit to the page, the modal window should not display.


 WordPress